GLFW is a open source, free portable framework for application development or creating windows in association of OpenGL contexts. Written in C, it is basically a static link library that constitutes a powerful API (Application Program Interface) that simplifies the process of handling operating system specific tasks, such as opening an OpenGL window, creating contexts, handling events and reading mouse and keyboard input.
GLFW has native support in Windows, Linux, and other operating systems such as OS X. Linking GLFW to Win32 application makes the mechanism of creating and setting up a window easy for rendering 2D or 3D scene by using OpenGL. In short, GLFW is one of the best available OpenGL toolkits.
If you’re using Code::Blocks, setting up GLFW project is easy. This post gives a step-by-step procedure to setup GLFW in CodeBlocks which will enable you to create a window with an OpenGL context and read input from keyboard, mouse and joysticks in a platform-independent way.
Steps to Setup GLFW in CodeBlocks:
Step 1: Download & Extracting
First, you need to download GLFW framework. For windows you can download the framework from here; for other OS, you can download it from glfw.org.
The downloaded file is in compressed (.rar) format. Extract or unzip the file to certain easily accessible location in your computer.
Step 2: Copying & Pasting Files
Open the “include” folder in the extracted file and copy the glfw.h file to this folder location – C:Program FilesCodeBlocksMinGWincludeGL
Open “lib-mingw” folder in the extracted file and copy libglfw.a and libglfwdll.a files to this folder location – C:\Program Files\CodeBlocks\MinGW\lib
Open “lib-mingw” folder in the extracted file and copy glfw.dll files to this folder location – C:\Windows\System32
Step 3: Start Code::Blocks IDE. The following screen will appear on your screen.
Click on “Create a new project”, and a window named “New from template” appears as shown below:
This is where you select templates. Out of the number of templates, select GLFW Project. Another window as shown below follows which is the GLFW project welcome screen. Click Next.
Again, another window with the same title “GLFW Project” appears. In this window, you have to enter the project name and location of folder to create the project. Project file name and resulting file name are spontaneously filled up. Click Next.
Another window appears as given below. In this select this file location – C:\Program Files\CodeBlocks\MinGW and then click Next.
The resulting window should look like this. Click Finish.
Step 4: Finally a GLFW project is created in CodeBlocks with default small program.
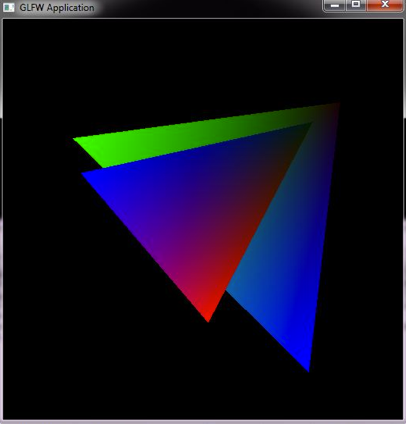
Run this program and you should see a window as shown below. If your project output comes as this image then you successfully created the GLFW project.
Sometimes even after following the all these steps correctly, GLFW and Code::Blocks setting doesn’t work in your computer. The compiler might crash saying – “undefined reference to glfwInit()”. This problem is basically due to installation of 32-bit version of Code::Blocks and 64-bit version of GLFW on a 64-bit windows 7.
So, before proceeding with the setup of GLFW in CodeBlocks, make sure you are using Code::Blocks and GLFW of same bit. This setting should generally work in all computer: 64-bit Windows, 32-bit CodeBlocks and 32-bit GLFW.
